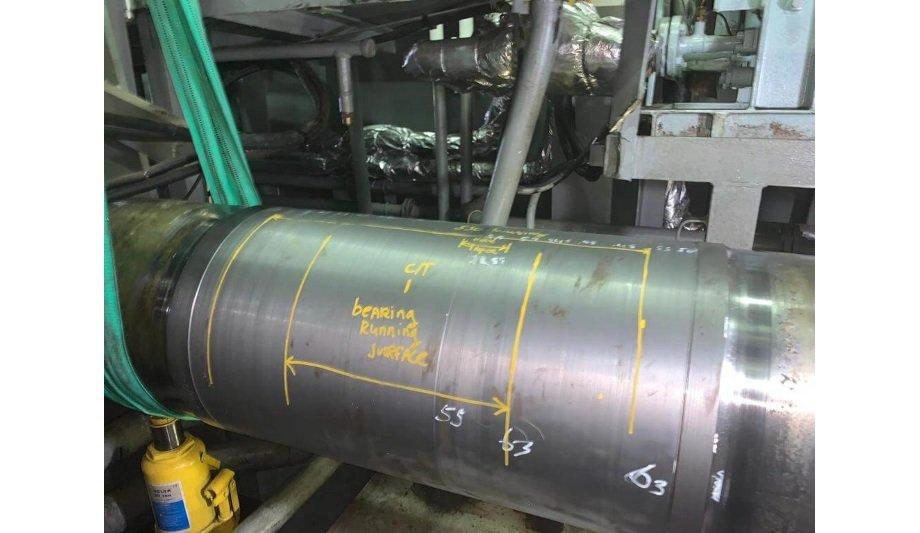
A recently built general cargo vessel experienced a bearing failure on its intermediate propeller shaft bearing. Goltens was contacted to perform an inspection on the bearing shell and pedestal and to propose a solution.
Upon inspection it was determined that the entire housing would require repair, due to extensive damage on the bearings, sealing areas, and housing mating surfaces. Further, an inspection of the shaft showed areas of high hardness but no signs of cracks. Goltens proposed that the bearing housings be sent to its workshop for repair and that the intermediate shaft be machined 1.00 to 1.5mm to remove the hardness and clean the running surface.
Custom bearing shells
Goltens received the bearing housing in the workshop and set to work repairing it
Goltens was awarded the repair of the bearing housing, but the owner awarded the shaft repair to Goltens’ competitor as Goltens’ specialists would not be available for a few days due to other ongoing jobs.
Goltens received the bearing housing in the workshop and set to work repairing it. The heat from the failure had caused the lower housing to collapse 0.8 to 1.0mm and the labyrinth seal cast into the housing was badly damaged. Goltens set to work machining the mating surfaces to restore flatness, along with machining out the forward and aft labyrinth seals. Final machining would be delayed until the finish diameter of the shaft and custom bearing shells was known.
Needed machining repairs
Goltens had proposed to complete the machining in 5-7 days on-site. After multiple weeks and failed attendances, the company initially selected to do the repair gave up on machining the shaft. Ship owner contacted Goltens, and within the same day, Goltens readied the custom tools and deployed machinists to undo the damage and complete the needed machining repairs.
Upon inspection, Goltens found multiple scoring marks from the failed machining
Upon inspection, Goltens found multiple scoring marks from the failed machining, as well as taper that ran 350mm along the shaft length with high ovality. Radius grooves were machined at the edge of the shaft for alignment of the in-situ machines and Goltens proceeded to remove 0.30mm from the shaft to correct ovality and taper. Once ovality was removed, a deep radial groove caused by the other company, remained on the shaft surface. This required Goltens to machine an additional 0.30mm prior to final honing and polishing the shaft surface.
Final scraping adjustments
Goltens finished the machining in seven days with a final diameter of 367.30mm. A custom bearing was machined to a +.55mm inside diameter, with cast iron labyrinth seal inserts fabricated and locked into the housing set to an inside diameter of 370.00mm. Goltens then transferred the repaired pedestal bearing to the vessel and rigged it into place and aligned the bearing.
A successful jack up test was then performed on the shaft with 6.3 tons before reaming the fitting bolt holes and installing the fitting bolts in place. Goltens then poured the Chockfast foundation and waited for the compound to cure before tightening the foundation bolts. Final scraping adjustments were made to ensure the right clearance before a final jack up test was completed. The bearing was then reassembled and tested at low RPM with satisfactory oil flow.
